
See how to fix or increase PHP memory limit in WordPress
If your WordPress site has a lot of media content or is running large scripts, you may encounter the following error message when editing your site:
- Fatal error: Allowed memory size of XXXXX bytes exhausted.
- Fatal error: Out of memory.
This means that your WordPress code needs more memory than the given default value. However, fixing the problem is not as complicated as it seems.
Read on as this tutorial will explain what the WordPress memory limit is, how to increase it, and why you might encounter one of the above error messages.
- What is WordPress memory limit?
- How to increase WordPress memory limit?
- How to check WordPress memory limit?
- What Causes the “WordPress Memory Limit Exhausted” Error?
What is WordPress memory limit?
WordPress memory limit is also known as WordPress PHP memory limit or simply PHP memory limit. It primarily defines the maximum amount of memory a script can use on the website.
Servers store all data and files for websites. So, a server must have the storage capacity, processors, and RAM or memory needed to keep the website up and running.
The RAM capacity of a server varies according to the hosting provider and the plan used. A starter plan usually offers a low amount of RAM compared to a business or pro plan.
Each app and web function takes up some memory. The more plugins installed or media files loaded, the more memory the site will require. If you run out of memory, your site's loading speed may slow down or worse, it won't load at all.
Therefore, the WordPress memory limit exists to ensure that the site's scripts do not exceed the server's RAM capacity.
How to increase WordPress memory limit?
By default, the memory limit is set to only around 40MB, which might not be enough for your website. However, there are several methods to increase it.
You can modify the .htaccess file and wp-config.php, configure it using CPanel/hPanel PHP configuration.
Increase Memory Limit via Hostinger File Manager
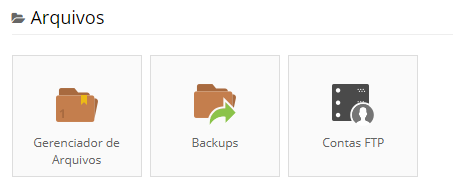
A more direct method to modify the .htaccess and wp-config.php file is through the File Manager in your control panel. For this tutorial, we will be using hPanel:
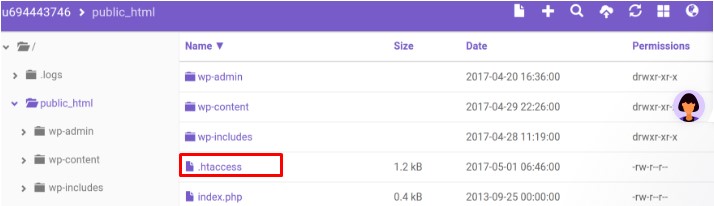
- Login hPanel, navigate to the section Files and access the File manager.
- open the folder public_html or root directory and double-click .htaccess to open the file.
- Insert the code:
<IfModule mod_rewrite.c>

php_value memory_limit 512M

php_value post_max_size 256M

php_value max_input_time 300

php_value max_execution_time 600

php_value upload_max_filesize 256M

php_value max_input_vars 5000

</IfModule>
in the file .htaccess and press SAVE & CLOSE when finished.

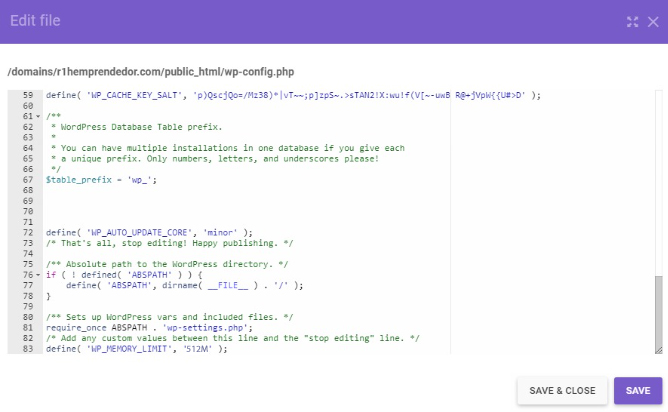
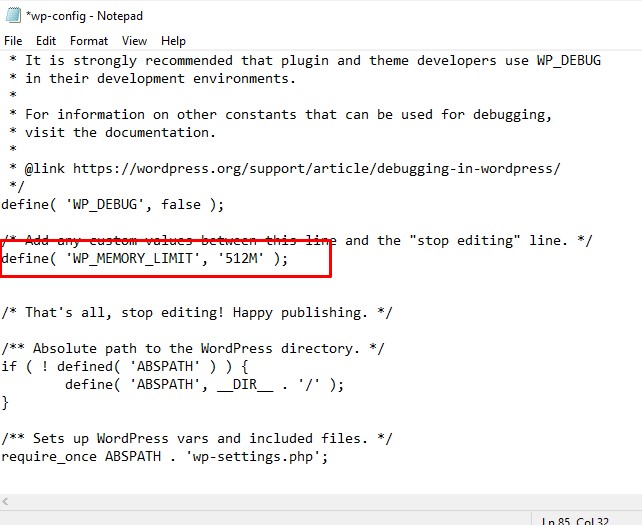
- Now go to file wp-config.php and double click to open the file and below the line of code /* Add any custom values between this line and the “stop editing” line. ???????? Add:
define( 'WP_MEMORY_LIMIT', '512M' );
and press SAVE & CLOSE when finished.
Although the above changes are not significant, we recommend that you back up your site first. This ensures that you won't lose your WordPress site if something goes wrong. Click here and see how to make a backup in WordPress.
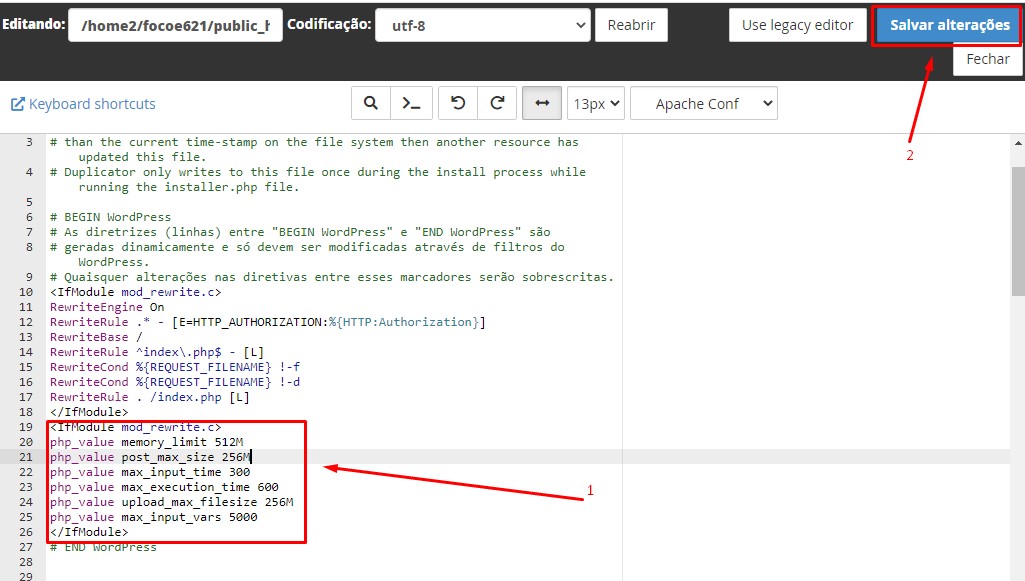
Increase Memory Limit via CPanel HostGator File Manager or similar
A more direct method to modify the .htaccess and wp-config.php file is through the File Manager in your control panel. For this tutorial, we'll be using HostGator's CPanel:
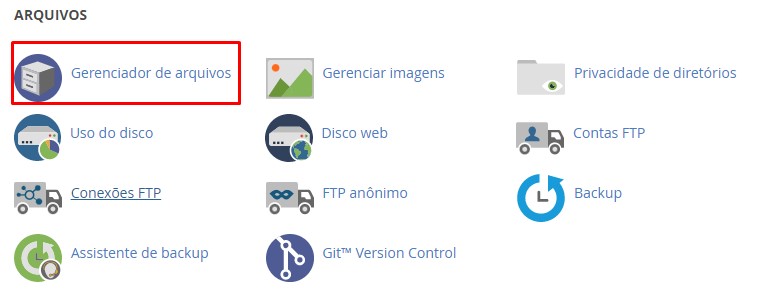
- Login CPanel, navigate to the section Files and access the File manager.
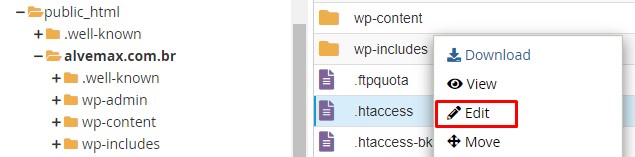
- open the folder public_html or root directory and right-click and then click Edit.
- Insert the code:
<IfModule mod_rewrite.c>

php_value memory_limit 512M

php_value post_max_size 256M

php_value max_input_time 300

php_value max_execution_time 600

php_value upload_max_filesize 256M

php_value max_input_vars 5000

</IfModule>
in the file .htaccess and press Save editions when finished.
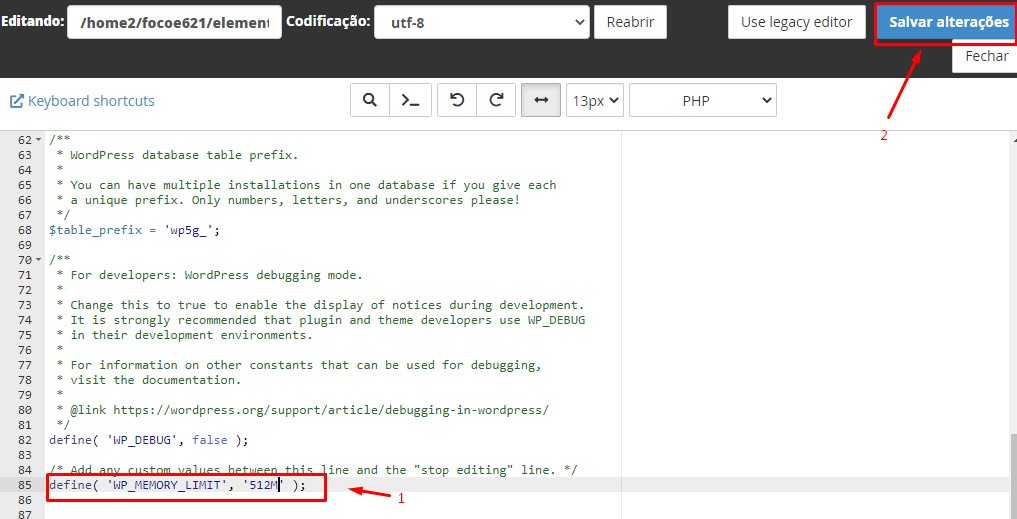
- Now go to file wp-config.php and click with the right mouse button and then on Edit and below the line of code /* Add any custom values between this line and the “stop editing” line. ???????? Add:
define( 'WP_MEMORY_LIMIT', '512M' );
and press Save editions when finished.
Although the above changes are not significant, we recommend that you back up your site first. This ensures that you won't lose your WordPress site if something goes wrong. Click here and see how to make a backup in WordPress.
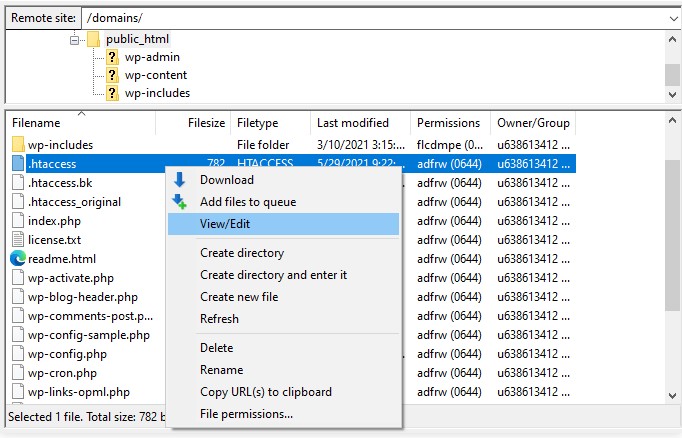
Increase PHP Memory Limit via FTP
One way to edit the .htaccess and wp-config.php file is through an FTP client like FileZilla. Make sure to connect FileZilla to your site's FTP account before continuing with the Tutorial:
Editing the .htaccess file
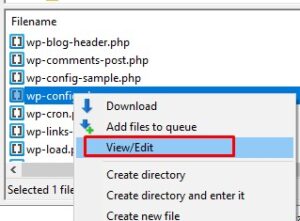
- Access the folder public_html of the site or the root directory and locate the file .htaccess.
- Right-click on the file and select View/Edit to be directed to the text editor.
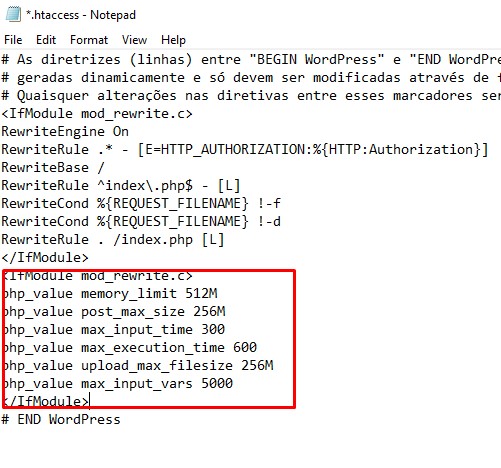
- Insert the code:
<IfModule mod_rewrite.c>

php_value memory_limit 512M

php_value post_max_size 256M

php_value max_input_time 300

php_value max_execution_time 600

php_value upload_max_filesize 256M

php_value max_input_vars 5000

</IfModule>
in the file .htaccess and press Ctrl + S when finished.
- Now go to file wp-config.php and right click on the file and select View/Edit to be taken to the text editor and below the line of code /* Add any custom values between this line and the “stop editing” line. ???????? Add:
define( 'WP_MEMORY_LIMIT', '512M' );
and press CTRL+S when finished.
How to check WordPress php memory limit?
After setting the memory limit, see if it worked. The following steps apply to users running WordPress 5.2 and above:
-
-
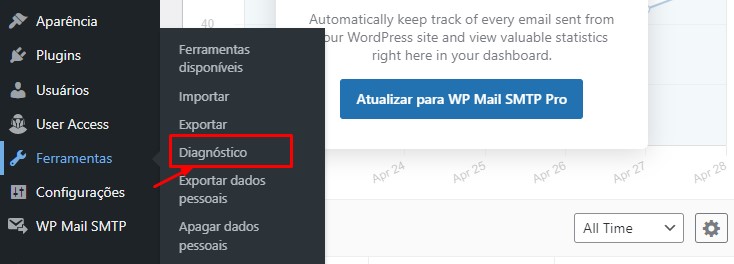
- Access the WordPress dashboard, hover over Tools and select Diagnosis.
-
-
-
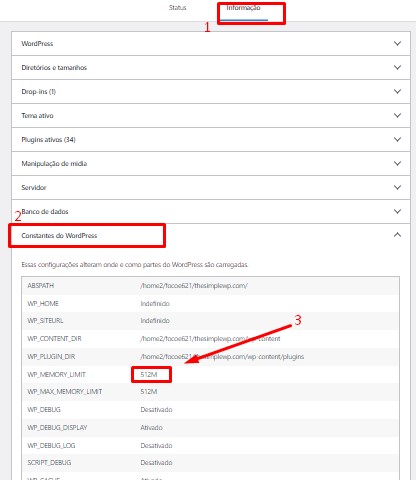
- choose tab Information and click on WordPress constants.
-
What Causes the “WordPress Memory Limit Exhausted” Error?
The most common cause is that the memory limit is set to the default value instead of the highest option. Therefore, it is important to check before starting to fix the problem.
If this is not the case, then you may be out of hosting resources. As your WordPress site grows, the size of your database, in addition to the number of scripts and files, also increases. Also, there may be plugins or themes that also need extra memory to run.
Hosting providers only allocate a certain amount of resources including RAM limit for different types of hosting plans. When starting your WordPress journey, you may have chosen a plan with limited RAM due to affordable pricing, but it might be time to upgrade.

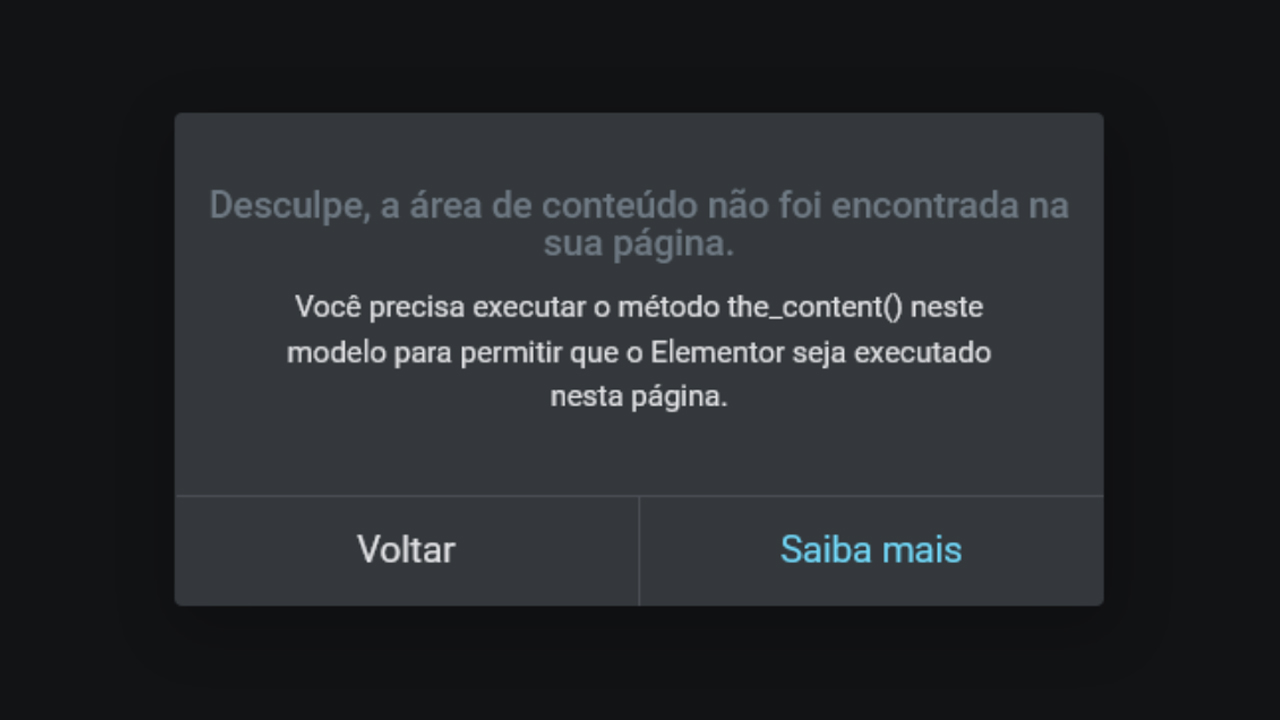
The content area was not found on your Elementor page
How to Fix “The content area was not found on your page” Error in Elementor This article explains what to do if you get the message:
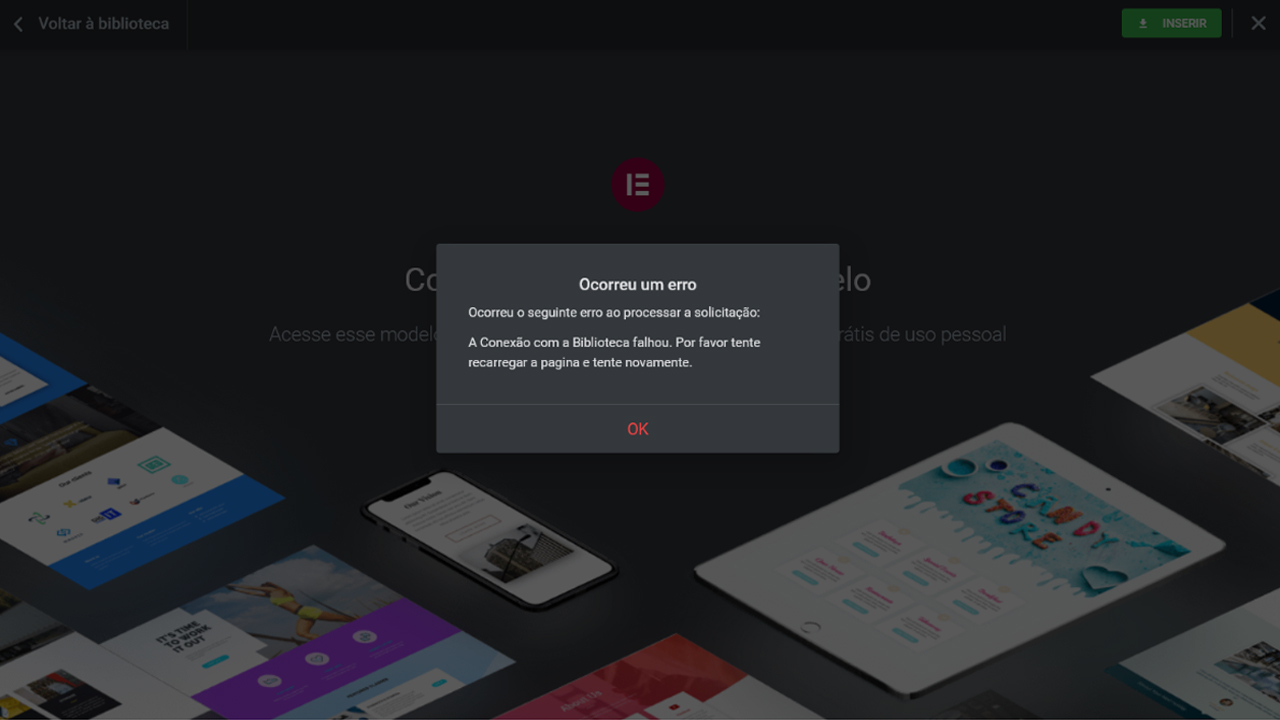
Error Connecting to Elementor Template Library
Here's How to Fix Error Connecting to Elementor Template Library When You Try to Connect to Elementor Free Template Library
How to Fix or Increase PHP Memory Limit in WordPress
See how to fix or increase PHP memory limit in WordPress If your WordPress site has a lot of media content or
How to Fix Template Import Error in Elementor
See how to fix an error when importing a Template in Elementor When trying to import a Template in Elementor, I came across the message “Occurred

One comment
[…] When you try to connect to Template Library from Elementor Free or Elementor Pro you get the error message: “An error occurred The following error occurred while processing the request The Connection to Library failed. Please try reloading the page and try again”. This problem is usually related to the PHP Memory Limit that is low, most hosting providers leave this limit below what Elementor needs to connect to your Library, to solve this we have a tutorial on how to increase the memory limit PHP on some providers like Hostinger HPanel, Hostgator CPanel and via FTP: CLICK HERE AND ACCESS THE TUTORIAL NOW. ????????